Last updated: May 2026 | Reading time: 12 min | Category: Car Care & Cleaning
Key Takeaways
- Fabric and leather seats require completely different products — using the wrong cleaner on either material causes damage that’s difficult or impossible to reverse
- The most common mistake: soaking fabric seats with too much liquid, which leads to mold growing underneath the foam — damp is the goal, never wet
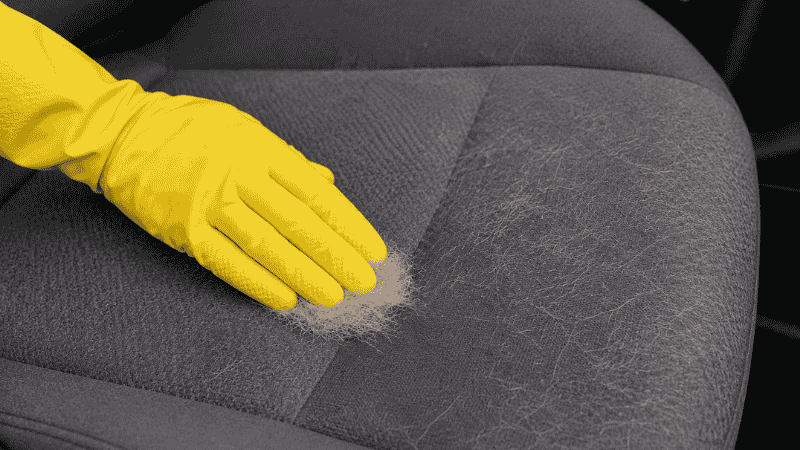
- Pet hair requires a rubber tool, not just a vacuum — a lug of a vacuum won’t pull embedded fur out of fabric; a rubber glove or pet hair remover brush does it in seconds
- For stains: blot, never rub — rubbing pushes the stain deeper into the fibers. Every time.
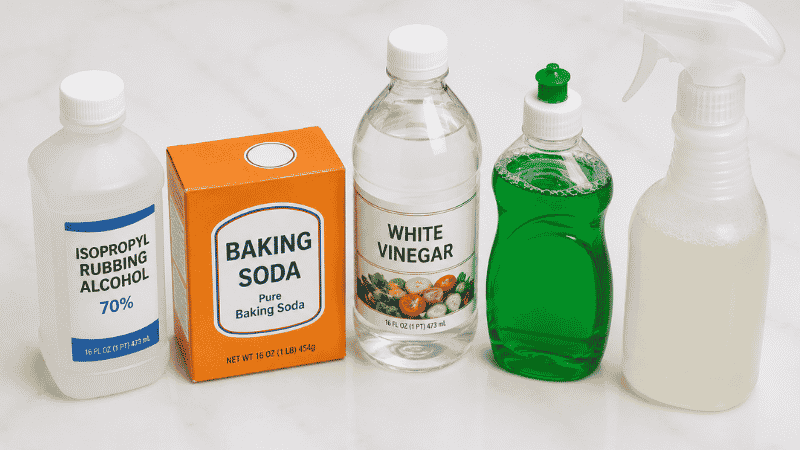
- You can clean car seats effectively with products you probably already own — dish soap, white vinegar, baking soda, and microfiber cloths handle most situations without any specialty products
The Moment You Actually Look at Your Car Seats
You’ve been avoiding it. Maybe it happened gradually — the coffee that splashed when you braked hard, your dog’s weekly presence in the back seat, the french fry your kid dropped six months ago that you swore you’d deal with later. Or maybe it was one specific incident: the smoothie, the wet dog, the carsick passenger.
Either way, you’re looking at your car seats now and thinking: where do I even start?
The answer matters more than most people realize, because car seats are one of those things where doing it wrong is genuinely worse than not doing it at all. Soaking fabric seats creates mold problems you won’t discover for weeks. Using the wrong cleaner on leather can strip the finish permanently. Rubbing a stain instead of blotting it sets it into the fabric in a way that makes it nearly impossible to remove.
This guide covers how to clean car seats based on what you actually have: your seat material (fabric, leather, or leatherette), what kind of mess you’re dealing with, and what tools you have available. No requirement for expensive specialty equipment. No brand loyalty required. Just the methods that actually work.
Before You Start: Know What Your Seats Are Made Of
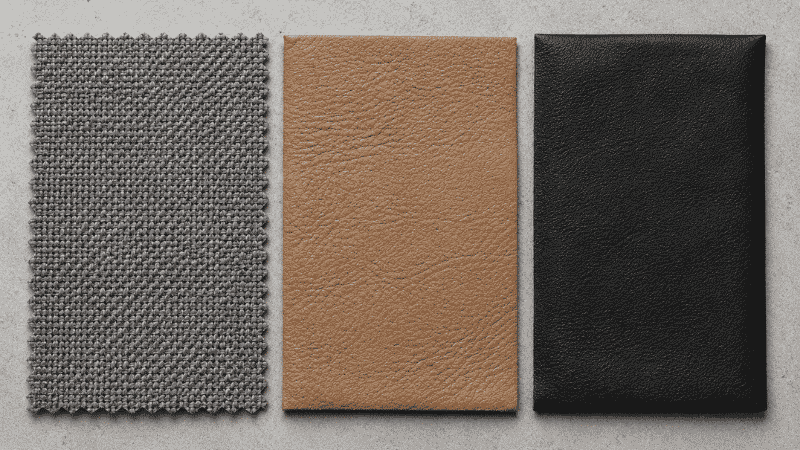
The single most important factor in car seat cleaning is material. Every other decision follows from this.
Fabric / cloth seats: Most common in economy and mid-range vehicles. Highly absorbent, stain easily, but also respond well to proper cleaning when done correctly. The biggest risk is over-wetting, which leads to mold in the foam padding underneath.
Genuine leather seats: Found in premium vehicles and higher trims. Leather needs specific products — it’s a natural material that can dry out, crack, and lose its finish if cleaned with anything too harsh or too alkaline. Must be conditioned after cleaning.
Leatherette / faux leather / vinyl: Found in many modern vehicles across all price ranges — increasingly common as a practical alternative. More forgiving than genuine leather, but still shouldn’t be treated with harsh cleaners. Wipes clean more easily than fabric.
Alcantara / microsuede: Found in sports and performance vehicles. Requires very specific care — usually just brushing and light cleaning. Check your owner’s manual if you’re not sure.
If you’re not certain what material your seats are, check your owner’s manual or look up your vehicle’s trim specification online. Cleaning genuine leather with a fabric cleaner, or vice versa, is where expensive mistakes happen.
How to Clean Fabric Car Seats
What You Need
Option A — Basic household supplies:
- White vinegar
- Dish soap (a few drops)
- Warm water
- Spray bottle
- Soft-bristled brush (an old toothbrush works for crevices)
- Multiple microfiber cloths
Option B — Dedicated products:
- Fabric upholstery cleaner (Chemical Guys Fabric Clean, Meguiar’s Carpet & Interior Cleaner, or similar)
- Soft-bristled detailing brush
- Microfiber cloths
- Portable carpet extractor (optional but significantly more effective for deep stains)
Step 1: Vacuum First — Always
Before anything wet touches the seat, vacuum thoroughly. Loose debris, crumbs, pet hair, and dust mix with cleaning solution to form a paste that’s harder to remove than the original mess. Use a crevice tool to get into the seam between the seat cushion and backrest — that gap collects more debris than anywhere else.
For pet hair specifically: vacuum passes alone rarely pull embedded fur from fabric. Put on a rubber glove, dampen it slightly, and run your hand firmly across the seat surface in one direction. The fur clumps and lifts away from the fabric. A rubber pet hair removal brush does the same thing faster. Do this before vacuuming and the vacuum picks up the clumped fur easily.
Step 2: Address Stains Before General Cleaning
If you have visible stains, treat them before you clean the whole seat — general cleaning can set a stain if done in the wrong order.
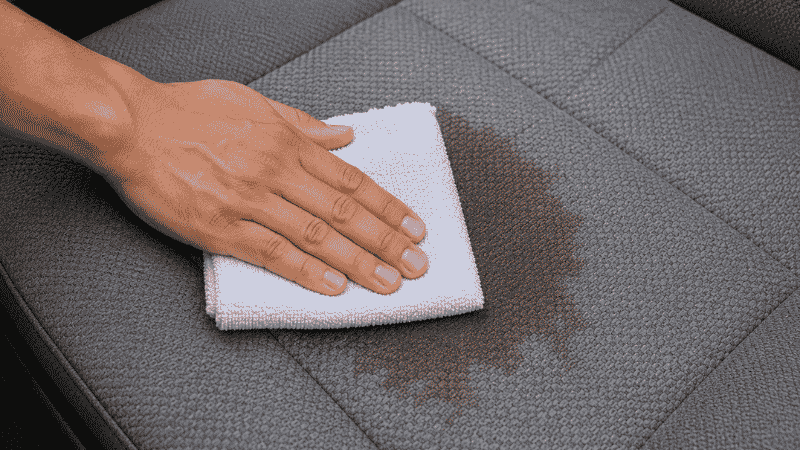
The universal rule: blot, never rub. Rubbing pushes the stain deeper into the fabric fibers and spreads it laterally. Always press a clean cloth onto the stain, hold briefly, and lift. Repeat with a clean section of cloth each time.
For fresh spills: Act immediately. The faster you blot up a liquid spill, the less it penetrates the foam underneath. Blot up as much as possible with a dry cloth before applying any cleaning solution.
For coffee or tea stains: Mix one cup of warm water with a tablespoon of dish soap and a tablespoon of white vinegar. Apply sparingly to the stain, let sit 2–3 minutes, then blot with a clean cloth. Repeat until the stain lifts.
For food stains: Scrape off any solid material with a plastic card or spoon first — never push it into the fabric. Then treat with the dish soap solution above.
For ink stains: Isopropyl alcohol (rubbing alcohol) on a cotton ball, applied to the stain and blotted — don’t rub. Ink is one of the harder stains to remove; repeat applications and patience are more effective than pressure.
For pet urine or vomit: These require an enzyme-based cleaner — standard cleaners mask the smell temporarily but don’t break down the organic compounds. Folex, Bissell Pet Stain & Odor, or any enzyme upholstery cleaner will work. Apply, let sit 5–10 minutes, then blot thoroughly. The enzyme needs contact time to work. A research review in the Journal of Veterinary Behavior confirmed that enzyme-based cleaners are significantly more effective at eliminating biological odor sources than surfactant-only cleaners.
For mold or mildew smell: This usually means moisture got into the foam at some point. Mix equal parts water and white vinegar in a spray bottle, mist the area lightly, let sit 10 minutes, then blot dry. Air out the car with windows open for several hours. Prevention: always let seats dry completely after any liquid cleaning before closing the car.
Step 3: Clean the Full Seat Surface

Once stains are treated, clean the entire seat to avoid leaving clean spots surrounded by general grime — which looks worse than an uncleaned seat.
DIY solution: Mix two cups of warm water with one tablespoon of dish soap and one tablespoon of white vinegar in a spray bottle. Shake gently.
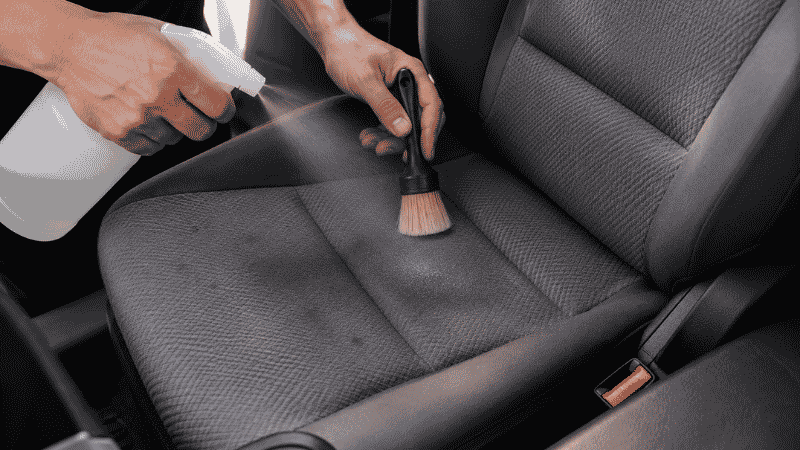
Application: Lightly mist a section of the seat — you want it damp, not soaking. The foam padding underneath can hold moisture for days if over-saturated, and trapped moisture grows mold within 24–48 hours in warm conditions. This is the mistake that creates a smell worse than the original stain.
Work the solution in with a soft brush using circular motions, then switch to straight strokes to lift it back out. Immediately blot with a dry microfiber cloth to absorb the cleaning solution and the loosened dirt.
Work in sections: top of seat back → lower seat back → seat cushion front → seat cushion sides. Don’t let solution pool or run.
Step 4: Dry Thoroughly

Open all windows and doors. If you have a fan or portable air circulator, position it to blow through the car. Seats should be completely dry before you close the car — in warm weather this takes 2–4 hours; in cool or humid conditions, 4–8 hours.
Do not close the car with damp seats in warm weather. The combination of heat, humidity, and trapped moisture is exactly what mold needs to establish itself under the foam. Once mold is in the foam, surface cleaning won’t fix it.
How to Clean Leather Car Seats
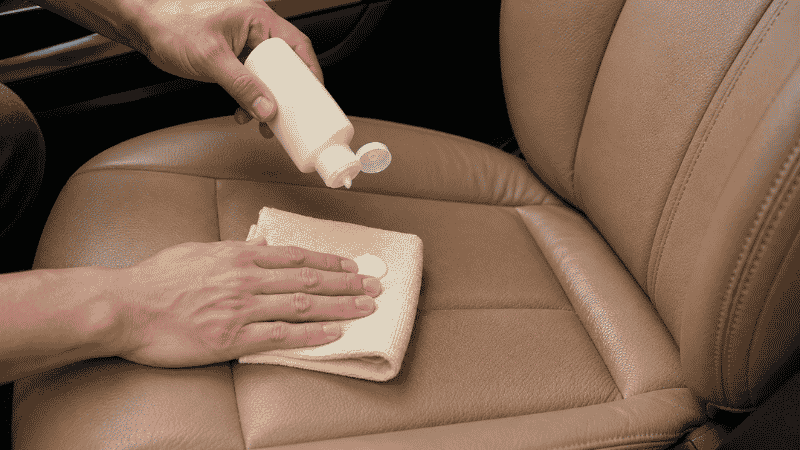
Leather is more forgiving of surface dirt than fabric — it wipes clean more easily. But it’s significantly less forgiving of wrong products. Alkaline cleaners, ammonia-based products, and even some “all-purpose” interior sprays strip leather’s natural oils, leading to drying and cracking that can’t be undone without professional restoration.
What You Need
- Dedicated leather cleaner (Chemical Guys Leather Cleaner, Lexol Leather Cleaner, Meguiar’s Gold Class Leather Cleaner)
- Leather conditioner (Lexol Leather Conditioner, Chemical Guys Leather Conditioner)
- Soft microfiber cloths — minimum 3
- Soft-bristled brush for textured leather or perforations
Step 1: Vacuum First
Same as fabric — remove all loose debris before introducing any liquid. Use a soft brush attachment; the crevice tool with the bare nozzle can scratch leather if pressed too firmly.
Step 2: Clean with Leather-Specific Cleaner
Apply leather cleaner to a microfiber cloth — not directly to the seat. Spray directly risks getting cleaner into perforations and seams where it sits and eventually causes staining or mold.
Wipe in straight lines rather than circles. Circular motions on leather can redistribute dirt into the pores rather than lifting it. Use a fresh section of cloth regularly — you’re cleaning dirt off, not redistributing it.
For textured leather or visible dirt in the grain: a soft-bristled detailing brush with a small amount of leather cleaner loosens embedded grime without scratching. Work gently with the grain direction, then wipe away with a clean cloth.
For stitching and seams: use a soft toothbrush. Stitching accumulates body oil and grime and is often forgotten during cleaning, which is why it turns darker over time.
Step 3: Condition Immediately After Cleaning
This step is not optional for leather. Cleaning removes surface contaminants but also removes some of the leather’s natural oils. Conditioning replaces those oils and keeps the leather supple.
Apply conditioner to a clean microfiber cloth and work it in with light circular motions, then straight strokes. Allow it to penetrate for 5–10 minutes, then buff off the excess with a clean dry cloth. The seat should look clean and slightly enriched, not shiny or greasy.
Genuine leather that isn’t conditioned regularly will crack — the timeline depends on climate (hot, dry climates accelerate it) and sun exposure. The American Leather Chemists Association recommends conditioning leather car seats every 3–6 months under normal use conditions.
Step 4: Protect
A leather protectant spray (applied after conditioning) creates a barrier against spills and UV damage. Not strictly necessary every cleaning cycle, but worth doing 2–3 times per year, especially before summer.
How to Clean Leatherette / Faux Leather Seats
Leatherette is the most forgiving of the three main materials. It doesn’t absorb liquid like fabric and doesn’t require conditioning like genuine leather.
Wipe down with a damp microfiber cloth for surface dust and light grime. For heavier cleaning, an interior all-purpose cleaner (diluted, about 5:1 water to cleaner) on a microfiber cloth works well. Dry with a clean cloth to prevent water spots.
Avoid petroleum-based products and silicone sprays — they can make leatherette look shiny and slick initially but degrade the material over time and make it feel sticky.
Stain-Specific Quick Reference
| Stain Type | Method | What Not to Do |
|---|---|---|
| Coffee / tea | Dish soap + white vinegar solution, blot | Don’t rub; don’t use hot water (sets the stain) |
| Pet urine | Enzyme cleaner, 5–10 min contact time, blot | Don’t use regular cleaner — masks smell only |
| Vomit | Remove solids first, then enzyme cleaner | Don’t scrub; removes solids but embeds liquid |
| Ink | Isopropyl alcohol, cotton ball, blot | Don’t use water — spreads ink |
| Blood | Cold water only (never hot), blot | Hot water sets blood protein permanently |
| Grease / oil | Cornstarch to absorb, then dish soap solution | Don’t wet immediately — absorb first |
| Mold / mildew | Vinegar solution, air dry completely | Don’t close car until fully dry |
The 10-Minute Version: Quick Clean for Time-Pressed Situations
Full deep cleaning isn’t always realistic. When you need the seats to look presentable quickly:
- Remove visible debris — pick up any solid items by hand, 1 minute
- Quick vacuum — main seat surfaces and the seam gap, 3 minutes
- Spot treat any visible stains — apply cleaner, let sit while you do step 4
- Wipe hard surfaces (headrests, seat sides) with a damp microfiber cloth
- Blot the treated stain, inspect
- Open windows to air out while you drive
This won’t replace a proper cleaning, but it addresses the worst visible issues in under 10 minutes. For ongoing maintenance between deep cleans, this routine done weekly prevents buildup from becoming a project.
When Cleaning Doesn’t Work — And When to Get Professional Help
Some situations are genuinely beyond what DIY cleaning can fix:
Mold under the foam: If the seat smells musty even after thorough surface cleaning, the mold is in the foam. Surface treatment won’t reach it. A professional detailer with extraction equipment, or in severe cases seat foam replacement, is the only real solution.
Set-in stains that have been rubbed: If someone rubbed a stain repeatedly before blotting, the pigment may be permanently embedded in the fabric fibers. A professional with an extractor can sometimes pull more out than surface methods allow, but there’s no guarantee.
Cracked or peeling leather: If leather is already cracking or the finish is peeling, cleaning and conditioning won’t repair the damage. Professional leather restoration or seat cover installation is the practical path forward.
Smoke odor: Smoke particles penetrate foam, fabric, and HVAC systems in ways that surface cleaning cannot reach. Professional ozone treatment is the standard solution — consumer ozone machines exist but require careful handling and proper ventilation. Surface-level “smoke eliminator” sprays provide temporary masking only.
Pet urine that has been there a while: Old, dried urine that has soaked through fabric and into foam requires professional extraction. Enzyme cleaners address the smell at the surface but can’t fully reach deeply saturated foam.
How Often Should You Clean Car Seats?
- Weekly: Quick debris removal and vacuum — 5 minutes
- Monthly: Wipe down hard surfaces, spot treat any fresh stains
- Every 3–4 months: Full fabric deep clean or leather clean + condition
- Immediately: Any spill, especially liquid — the faster you address it, the less damage it does
The drivers who never seem to have dirty cars aren’t doing major cleaning sessions constantly. They’re addressing small things immediately and doing light maintenance consistently. A coffee spill blotted up immediately is a 2-minute job. The same spill cleaned three weeks later is a 45-minute project.
FAQ
What is the best cleaner for fabric car seats? For most fabric seat stains, a simple solution of warm water, a few drops of dish soap, and white vinegar works effectively and safely. For tougher stains or full deep cleaning, a dedicated upholstery cleaner like Chemical Guys Fabric Clean or Meguiar’s Carpet & Interior Cleaner gives better results. For biological stains (pet accidents, vomit), an enzyme-based cleaner is the only option that actually eliminates the odor source.
Can I use dish soap to clean car seats? A small amount diluted in water — yes, for fabric seats. Dish soap is effective at cutting grease and lifting food stains. The key is using it sparingly and blotting it out thoroughly afterward. Dish soap left in fabric becomes sticky and actually attracts more dirt. Never use undiluted dish soap, and don’t use it on leather.
How do you get stains out of car seats without a steam cleaner? Most stains respond to a dish soap and white vinegar solution, applied sparingly, worked in with a soft brush, and blotted out with a microfiber cloth. The process takes more repetition than a steam cleaner but achieves similar results. For biological stains, an enzyme cleaner is necessary regardless of whether you have a steam cleaner.
How do you get pet hair out of car seats? A vacuum alone rarely removes embedded pet hair from fabric seats. The most effective methods: a rubber glove dampened slightly and dragged across the seat in one direction, a rubber pet hair brush (available for $10–$15), or a squeegee with a rubber blade. All three work by creating static friction that clumps the hair for easy removal. Do this before vacuuming, not after.
How do you clean leather car seats without damaging them? Use only dedicated leather cleaners — not all-purpose interior sprays, not vinegar solutions, not dish soap. Apply to a cloth, never directly to the seat. Wipe in straight lines. Immediately follow with a leather conditioner. The combination of wrong products and skipped conditioning is what causes leather to dry out and crack.
How long does it take car seats to dry after cleaning? Fabric seats cleaned with appropriate dampness (not soaked) dry in 2–4 hours with windows open in warm weather. In cool or humid conditions, plan for 4–8 hours. Leather dries within an hour since it doesn’t absorb water. Never close a car with damp fabric seats in warm weather — the trapped heat and moisture creates ideal mold conditions within 24 hours.
How do you get the musty smell out of car seats? A light mist of equal parts water and white vinegar, allowed to sit for 10 minutes and then blotted dry, neutralizes most surface-level musty odors. If the smell persists after the seat is fully dry, the mold is in the foam underneath, which requires professional extraction or foam replacement. Surface treatments cannot reach deeply embedded mold.
What’s Next
Clean seats are the biggest visual improvement you can make to your car’s interior. Once that’s done, these guides cover the next most impactful steps:
- How to clean your full car interior — seats are one part; the dashboard, windows, floor mats, and vents each have their own methods. (→ How to Clean Your Car Interior the Right Way)
- Car essentials every driver should have — including the microfiber cloths, interior cleaner, and handheld vacuum that make seat maintenance a 10-minute routine instead of a project. (→ Car Essentials Every Driver Actually Needs)
A clean car isn’t just about appearance. Research published in Environmental Research found that enclosed vehicle interiors concentrate particulate matter and biological contaminants at levels that can exceed outdoor air — regular interior cleaning meaningfully reduces that exposure.
References
- Environmental Research — Exposure to fine particulate matter and biological contaminants in passenger vehicle interiors, Vol. 214 (2022)
- American Leather Chemists Association (ALCA) — Care and Maintenance Standards for Automotive Leather, technical guidelines
- Journal of Veterinary Behavior — Enzyme-based cleaners vs. surfactant cleaners for biological odor elimination: comparative effectiveness review (2021)
- U.S. Environmental Protection Agency (EPA) — Indoor Air Quality: Vehicle Interior Air Pollution Guidance
This article contains affiliate links. AutoIXPro may earn a small commission on purchases through our links at no extra cost to you. All recommendations are based on genuine testing and research. See our Affiliate Disclosure for details.
Have a specific stain or seat material question? Contact us — we read every message.