
Key Takeaways
- The space you need is 1.5 times the length of your car — for a typical sedan, that’s about 22–24 feet; spaces longer than this are actually easy to parallel park into, even for beginners
- The entire maneuver happens at idle speed with no gas pedal — if you’re using the accelerator to parallel park, you’re going too fast; the foot brake controls everything
- The steering wheel timing is everything — most failures happen because people turn too early or too late, not because the space is too tight; understanding the spatial logic (not just the steps) fixes this
- You are allowed to start over as many times as you need — pulling forward and trying again is not failure; it’s what everyone does, including experienced drivers in unfamiliar vehicles
- Parking sensors and rear cameras don’t replace understanding the technique — they help, but knowing the method means you can parallel park in any car, anywhere, including rentals and borrowed vehicles
The Driver Who’s Been Going Around the Block for Eight Years
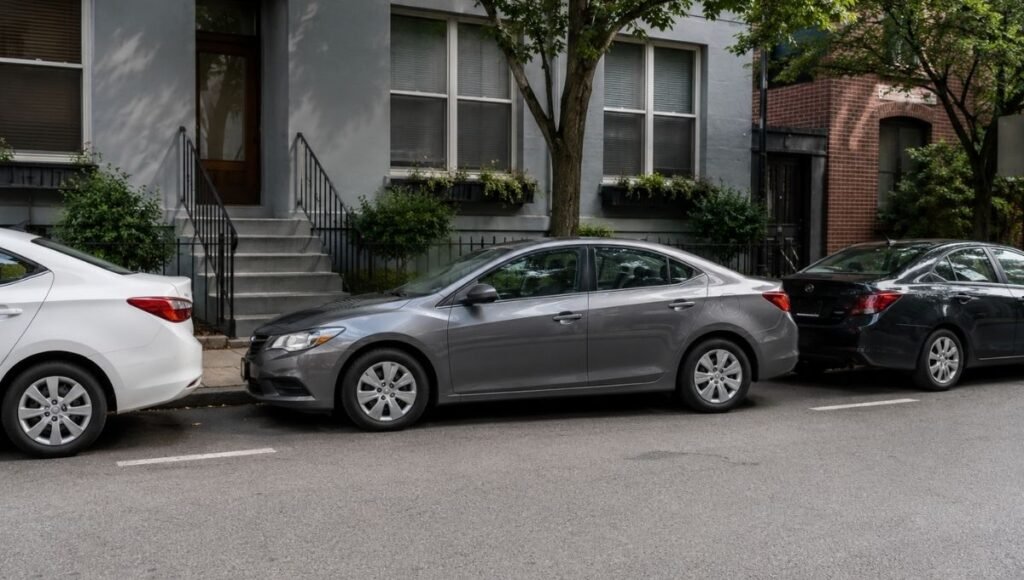
There’s a confession that shows up constantly whenever parallel parking comes up in driving discussions: experienced drivers — people who’ve been driving for years — admitting that they will circle a block twice, walk an extra five minutes, or park in a paid garage, rather than attempt a parallel parking spot they’re not sure about.
This is more common than anyone admits in polite company. And the reason is specific: parallel parking is the one driving skill that almost nobody practices after the driving test. You learn a rough version of it for the exam, pass, and then spend years avoiding situations that would require you to use it. Which means the skill never improves, the anxiety never decreases, and the block-circling continues indefinitely.
The honest truth about parallel parking is that it’s not particularly difficult once you understand the spatial logic behind each steering input. The frustrating thing about most tutorials is that they give you steps without giving you the why behind them — so when something goes wrong midway through (which it will), you have no idea what to correct.
This guide explains both what to do and why each step works. Once you see it that way, the whole maneuver becomes predictable rather than mysterious.
Before You Start: What “Good Enough” Actually Looks Like
Let’s manage expectations before anything else.
A successful parallel park does not mean perfectly centered between two cars with exactly six inches on each side. It means your car is:
- Within 18 inches of the curb (12 inches or less is ideal; most states legally require within 18 inches)
- Roughly parallel to the curb — not at a visible angle
- Not blocking the car in front or behind you
- Not sticking out into traffic
That’s it. If you’ve achieved those four things, you’ve successfully parallel parked, regardless of how many attempts it took or how long it took you. The mental image of perfectly centering a car in a tight space in one smooth motion is a movie-version of parallel parking that doesn’t reflect how actual experienced drivers do it.
The Spatial Logic: What’s Actually Happening During the Maneuver
Most tutorials give you steps. Here’s the logic behind the steps — which is what you actually need when things don’t go exactly as planned.
When you reverse into a parallel parking space, you’re essentially tracing an S-curve with your car. Your car needs to enter the space rear-first at an angle, and then straighten out to sit parallel to the curb.
The two steering wheel inputs correspond to these two phases:
First input (wheels right): You’re swinging the rear of your car toward the curb. The front of your car is still in the street, pivoting outward. This angles you into the space.
Second input (wheels left): You’re straightening the car by swinging the front end toward the curb while the rear stops moving outward. This brings you parallel.
The timing of when you switch from the first input to the second determines everything. Too early on the switch: you end up too far from the curb. Too late: you end up too close to the curb or hit the car in front. The reference point that tells you when to switch is the same for most vehicles — and that’s what the steps below teach you to recognize.
How to Parallel Park Step by Step
These instructions assume you’re parking on the right side of a two-way street between two parked cars. Adapt for one-way streets or left-side parking accordingly.
Step 1: Find the Right Space
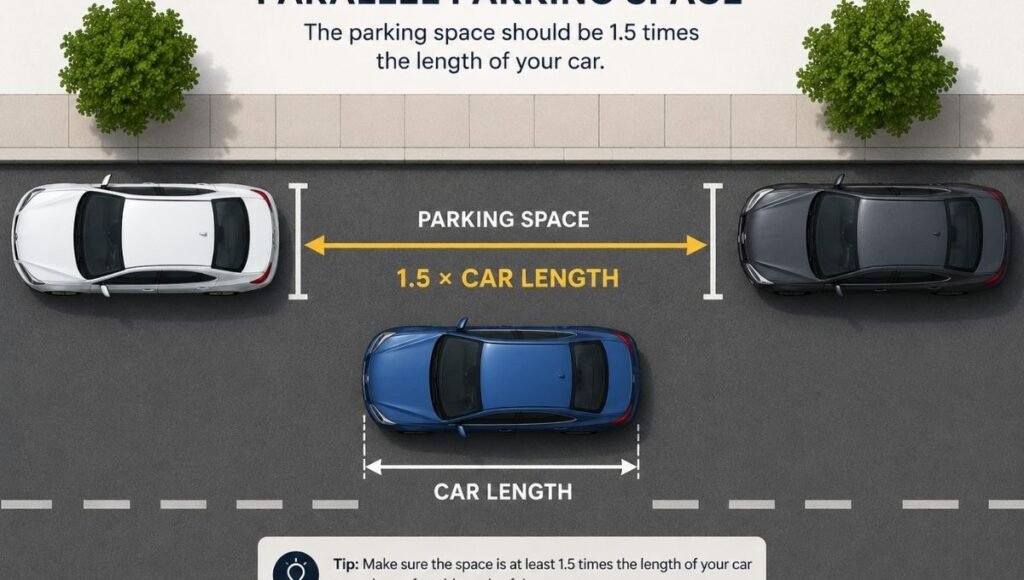
The space needs to be at least 1.5 times the length of your car. For a standard sedan (roughly 15 feet), that means 22–24 feet minimum. For an SUV or truck, calculate accordingly.
How to judge this without measuring: when you pull alongside the front car, the space should extend well past your rear bumper. If it looks borderline, it’s probably fine — most people overestimate how much space they need. If it looks genuinely too small, it is. Don’t attempt a space where you can’t see clear daylight between the two parked cars when you’re sitting in your driver’s seat.
Step 2: Signal and Position Alongside the Front Car
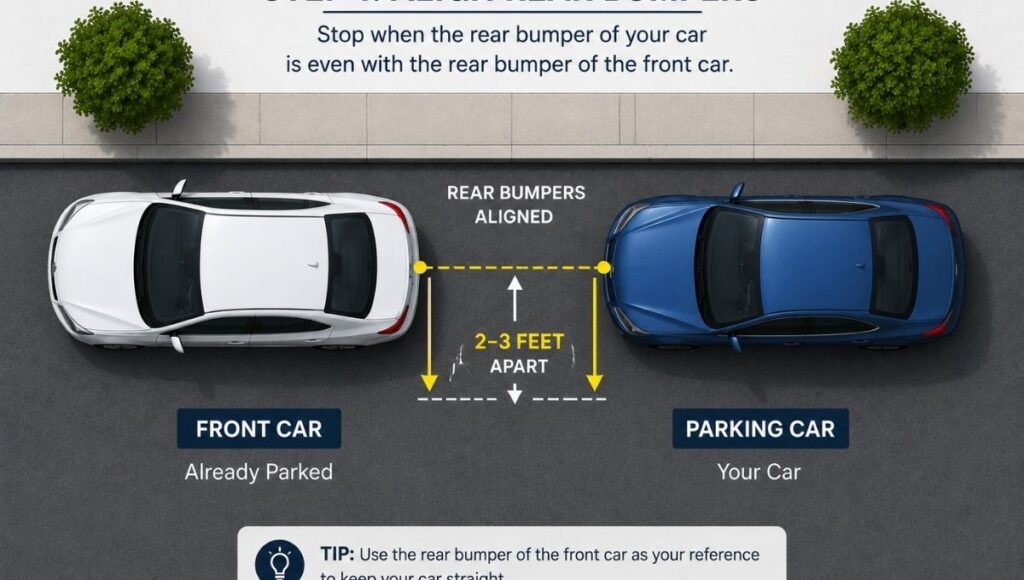
Turn on your right turn signal. This tells other drivers you’re about to parallel park — not turn right, but stopping to park. Pull forward until you’re roughly even with the front car, with your car about 2–3 feet away from it laterally. You should be approximately level: your rear bumper roughly aligned with the rear bumper of the car you’re parking behind.
This alignment matters more than most guides acknowledge. If you position too far forward, you’ll end up angled into the car in front. Too far back and you waste space that would’ve made the maneuver easier.
The two-car mirror alignment method: Line up your driver’s side mirror with the driver’s side mirror of the car in front of you. This is one of the most reliable alignment cues for typical sedans.
Step 3: Check Mirrors and Blind Spots
Before moving: check your left mirror for approaching traffic, your right mirror for cyclists or pedestrians near the curb, and turn around to physically look through the rear window. Do not rely solely on mirrors for this maneuver — the rear window view while reversing gives you information mirrors can’t.
In many jurisdictions, you’re required to yield to approaching traffic before beginning the parking maneuver. A car coming up behind you that’s clearly moving at traffic speed has the right of way. Let it pass before you begin reversing.
Step 4: Shift Into Reverse and Begin Moving Back Slowly — Wheels Straight
Take your foot off the brake gently and let the car idle backward. Keep the wheel straight (or nearly so) for the first foot or two of movement. You’re just beginning to enter the space.
Speed check: if you can’t keep pace with someone walking alongside the car, you’re going too fast. Parallel parking happens at walking pace or slower. The foot brake — not the accelerator — is your speed control for this entire maneuver.
Step 5: Turn the Wheel Sharply Right
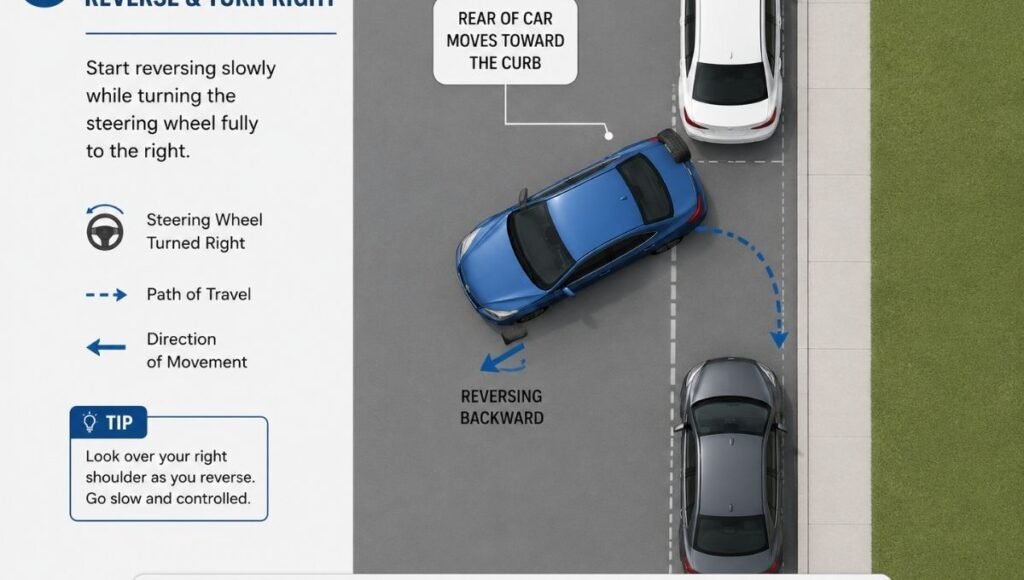
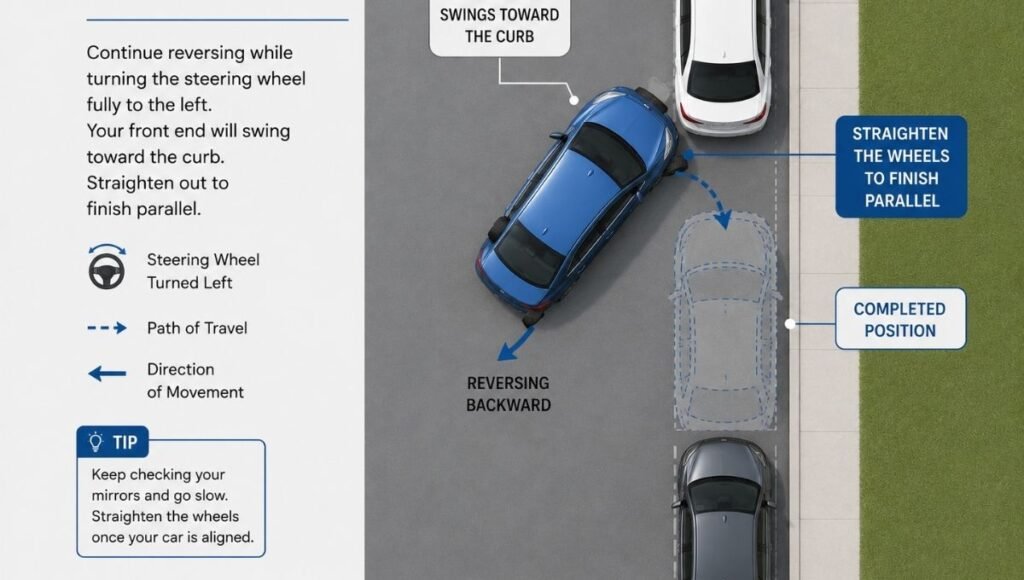
As you continue to roll back slowly, turn the wheel to the right — all the way, or close to it, in one smooth motion. Your car will now start angling toward the curb, rear-first. The front of your car will swing outward into the street.
When to begin this turn: When your rear bumper is approximately even with the front bumper of the car behind you. This is the critical timing reference. Use your right side mirror to watch the relationship between your rear corner and the car behind you.
Continue reversing slowly with the wheel turned right. Watch your right mirror — you should see the curb gradually approaching your rear wheels.
Step 6: Switch to Wheels Left — The Straightening Phase
When you can see in your right mirror that your rear wheel is about 6–12 inches from the curb, or when the front of the car behind you appears in your right mirror, it’s time to switch steering direction.
Turn the wheel smoothly to the left — straightening first, then continuing left. Your car will now swing the front end toward the curb while the rear settles. This is the phase that brings you parallel.
Continue reversing slowly with the wheel turned left. Watch the front car in your left mirror and the curb in your right mirror simultaneously. The front of your car should be swinging toward the curb as the rear stays close to it.
Step 7: Straighten Up and Stop
When your car is roughly parallel to the curb — or close to it — straighten the wheel and stop. Check your position: how far from the curb (aim for 6–12 inches), and whether you’re clearing both the car in front and the car behind.
If you’re too far from the curb: pull forward, angle slightly toward the curb as you move forward, then reverse again with the wheel turned left to bring the rear closer in.
If you’re at an angle (front sticking out): pull forward with the wheel turned right to bring the front in, then reverse straight to center.
Put it in Park, set the parking brake, turn off the engine. On a hill, follow the hill parking wheel direction rules before stepping out.
How to Back Into a Parking Spot (Reverse Bay Parking)
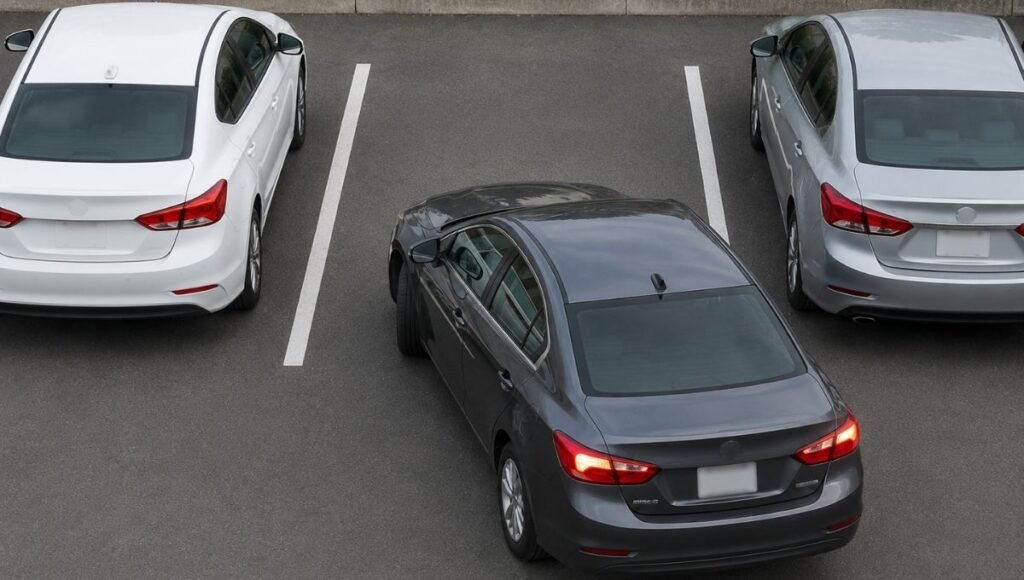
Reverse bay parking — backing into an angled or perpendicular spot rather than pulling in forward — is a separate but related skill. Many experienced drivers prefer it because exiting is significantly easier and safer: you’re pulling forward into traffic visibility rather than backing out blind.
The basic technique: drive past the space until the space is visible in your driver’s side mirror and the rear of your car is approximately even with the far edge of the space. Turn the wheel toward the space and reverse slowly, straightening as you enter. Watch all mirrors as you move.
The practical advantages of reverse parking:
- Significantly easier to exit, especially in busy parking lots
- Better visibility when leaving — you can see pedestrians and traffic before pulling out
- Reduces the likelihood of door-ding damage from the front doors of adjacent cars
- Required by law in some countries and encouraged by safety organizations
If your car has a reversing camera, use it — but don’t rely on it exclusively. The camera shows what’s directly behind the car; it won’t show something approaching from the side.
When Things Go Wrong Mid-Maneuver
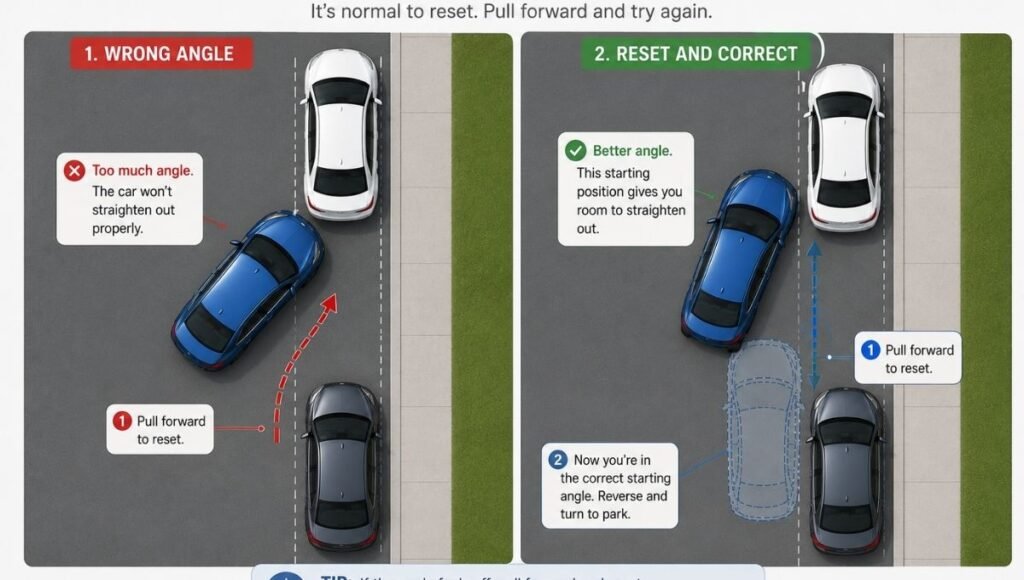
This is the section every other guide skips, and it’s the one new drivers actually need.
You’ve reversed too far and you’re at too steep an angle: Pull forward. Turn the wheel left as you pull forward, which brings your rear corner away from the car behind and resets your angle. You’re not starting over from scratch — you’re just adjusting your angle to try the straightening phase again.
Your front end is swinging too far out into traffic: You started the right-wheel turn too early, or moved back too far before switching to left. Pull forward, get back to the parallel position alongside the front car, and start the approach again. This is not failure — this is literally what everyone does.
You’re parallel but too far from the curb: More than 18 inches from the curb is too far — you’ll be blocking part of the traffic lane in many streets. From your parallel position, turn the wheel toward the curb as you reverse slightly to bring the rear closer in, then straighten.
The car behind you is now closer than you expected: Someone pulled into the space behind you while you were maneuvering. Allow extra clearance in your position — you’ll need to exit forward only, and you’ll need enough room to do it. If there’s genuinely not enough room to exit safely, you may need to wait for the car behind to move.
You’re taking a long time and there’s traffic behind you: This is the anxiety-amplifying scenario. Remember: drivers behind a car signaling to parallel park know they need to wait. You are legally in the right. Take the time you need. If you feel rushed and make an error, pull out, let traffic pass, and try again. One calm attempt beats three panicked ones.
Practicing Parallel Parking Without Pressure
The reason most new drivers’ parallel parking never improves is that they only attempt it under real-world pressure — with cars waiting behind them, pedestrians watching, and a genuinely tight space. That’s the hardest possible practice environment.
Where to practice without pressure:
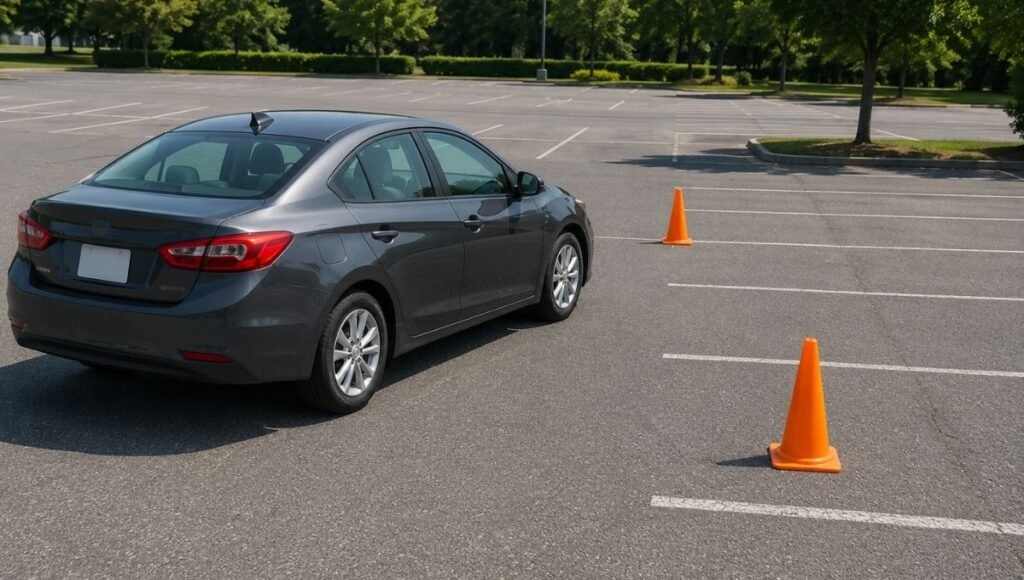
An empty parking lot with cones or bags to mark the space boundaries. Find a quiet residential street with an empty curb and practice pulling into and out of imaginary spaces. Use two trash cans (with the neighbors’ permission) to simulate the front and rear cars. Many DMV parking lots allow practice outside test hours.
The practice progression that actually builds skill:
Start with a space that’s double the length you need. When you can do that consistently, reduce to 1.75x your car length. Then 1.5x. The skill transfers — once you understand the reference points for timing your steering inputs, tighter spaces become manageable because you understand what you’re doing.
Ten repetitions of correct parallel parking in a low-pressure environment builds more skill than a year of occasional high-anxiety attempts in real traffic.
Does Car Size Matter?
Yes — but less than most people assume.
Longer cars need more space, obviously. But the spatial logic of the maneuver is the same regardless of vehicle length. The reference points shift: in a longer car, you may need to start your right-wheel turn slightly later because the car is extending further back when you’re positioned alongside the front car.
SUVs and trucks: The main challenge is reduced rear visibility and a longer wheelbase. A reversing camera is genuinely helpful here — not as a replacement for the technique, but as a supplement that reduces the guesswork on the rear corner’s proximity to the curb. If you’re driving a truck or full-size SUV, bias toward larger spaces until you’ve calibrated the reference points for that specific vehicle.
Small city cars: Smaller cars are actually easier to parallel park for most drivers, because the tighter turning radius makes the S-curve more forgiving. If you learned in a small car and are now driving something larger, expect a brief recalibration period.
Exiting a Parallel Parking Space
Most guides spend all their time on entry. Exiting deserves a mention because it’s where the second most common incidents happen.
The standard exit:
- Turn the wheel left (toward the center of the road)
- Back up slowly toward the car behind you until you have enough angle to pull out — check your rear mirror carefully
- Stop before getting too close to the rear car
- Check traffic in your left mirror — you need a gap to pull into
- Signal left
- Pull forward into traffic, straightening the wheel as you go
The cramped exit: When someone has parked closer behind you than was there when you arrived, you’ll need to alternate: forward with wheels right to bring the front in, reverse with wheels right to push the rear out, repeat until you have enough angle to exit. This takes longer but works — it’s the same principle as a three-point turn applied to exiting a parking space.
Always check for cyclists before pulling out. Bike lanes next to parking are common in cities, and a door or exiting car into a cyclist’s path is a serious accident risk.
FAQ
How do I parallel park step by step? Signal, pull alongside the front car with your bumpers roughly aligned, reverse slowly with wheel turned right until your rear approaches the curb, switch wheel to left to straighten, and stop when parallel. The full step-by-step is above, including the reference points for timing each steering input.
How much space do I need to parallel park? At minimum, 1.5 times the length of your car. For a typical sedan, that’s about 22–24 feet. More space makes the maneuver significantly easier. If the space looks borderline short from inside the car, it’s usually still workable — most drivers overestimate how much space they need.
Why do I keep ending up too far from the curb? Usually because the right-to-left steering switch happened too early. Let the rear get closer to the curb before switching to the left-wheel straightening phase. Also check that you’re pulling close enough alongside the front car before starting — too much lateral distance from the start means too much distance from the curb at the end.
Is it okay to take multiple attempts to parallel park? Completely normal and expected, especially when learning or parking an unfamiliar vehicle. Pulling forward to reset your angle and try again is not failure — it’s the standard process. Even experienced drivers make multiple attempts in tight spots.
How do I parallel park a large car or SUV? The technique is the same; the reference points shift slightly. A reversing camera helps with rear corner proximity. Seek larger spaces until you’ve calibrated for the vehicle’s length. Start the right-wheel turn a beat later than you would in a smaller car, since the car extends further behind you.
What’s the difference between parallel parking and reverse parking? Parallel parking places the car parallel to the curb, typically on a street between two parked cars, always done by reversing in. Reverse (bay) parking means backing into a perpendicular or angled parking space in a lot or garage. Different technique, same preference among experienced drivers: reversing in is usually safer for exiting.
Do parking sensors help with parallel parking? Yes — front and rear sensors tell you how close you are to the cars in front and behind. Reversing cameras help with the rear corner proximity to the curb. But understanding the technique means you’re not dependent on sensors, which is useful in older cars, rentals, or situations where the sensors aren’t calibrated for tight spaces.
What’s Next
Parallel parking is one of several parking and positioning skills that new drivers typically learn in isolation but use together:
- How to park on a hill — wheel direction rules for uphill and downhill parking, which apply even after you’ve successfully parallel parked on a slope. (→ How to Park on a Hill)
- Car essentials every driver should have — including the items that help in parking emergencies, from a portable jump starter to a basic emergency kit. (→ Car Essentials Every Driver Actually Needs)
- Car maintenance checklist — keeping your mirrors clean and properly adjusted makes parallel parking significantly easier; this fits into the monthly check routine. (→ Car Maintenance Checklist)
Parallel parking is a skill, not a talent. Skills are built through deliberate practice, not through hoping it gets easier over time. Ten low-pressure practice sessions will change how you feel about every parallel parking spot you encounter for the rest of your driving life.
References
- National Highway Traffic Safety Administration (NHTSA) — Backing and Parking Maneuvers: Crash Data and Risk Factors, analysis of parking-related crash incidents and common contributing factors including improper speed and timing
- AAA Foundation for Traffic Safety — Parking Behavior and New Driver Risk, research on the relationship between parking skill confidence and accident rates among drivers in the first three years of licensing
- California Department of Motor Vehicles (California DMV) — California Driver Handbook, Parallel Parking Section, official parallel parking procedures and legal distance-from-curb requirements
- Insurance Institute for Highway Safety (IIHS) — Backing Camera Effectiveness Research, data on rear camera and sensor effectiveness as supplements to (not replacements for) parking technique
Parallel parking question for your specific car or situation? Contact us — we read every message.